
Tikal Mirror Manager offers Eclipse administrators management capabilities of the internal plugin distribution using an internal plug in mirror site.
The New Mirror Site Project creation wizard is available under File > New > Project... > TUM > Mirror Site Project from the top level menu.
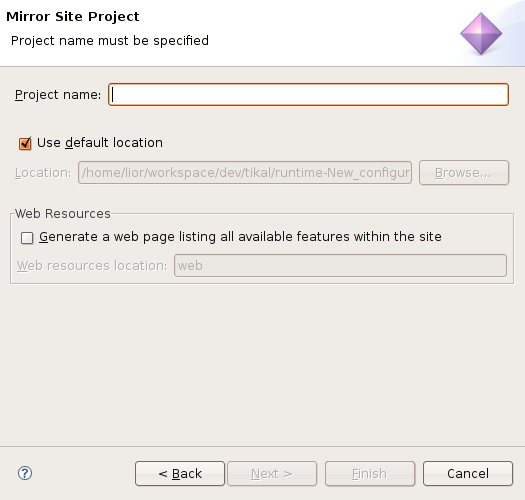
Project Settings
The Project Name for the mirror site project can be any valid directory name. The project Location field specifies the default location as a subdirectory nested inside the workspace location. The project location can be changed to any writable location by unchecking the Use default location checkbox and entering the location of choice.
Web Resources
The "Generate a web page" listing all available features within the site" option generates several web files that can provide an HTML index preview of the mirror site contents. The default location for the Web resources directory is a web/ folder; this location, however, can be overridden by the user.
Mirror Site Project Structure
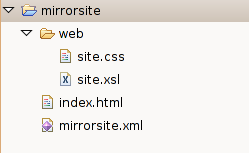
When a mirror site project is created, its manifest file will open in the Mirror Site Manifest editor. A mirorr site project has a mirrorsite.xml file located at its root. If the option to create a web page is chosen in the wizard, the project will also contain a web/ folder and an index.html file located in its root.
The Site Map page of the mirror manifest editor lists, categorizes and mirror the features hosted on the mirror site.
Managing the Site
Building a mirror site is a relatively simple task with the
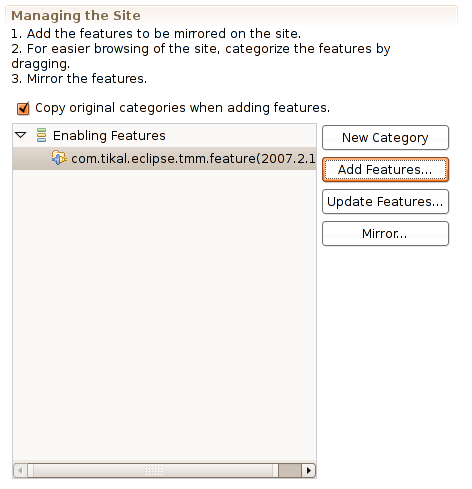
To select a feature on the site, you must first add it via the Add Feature... button.
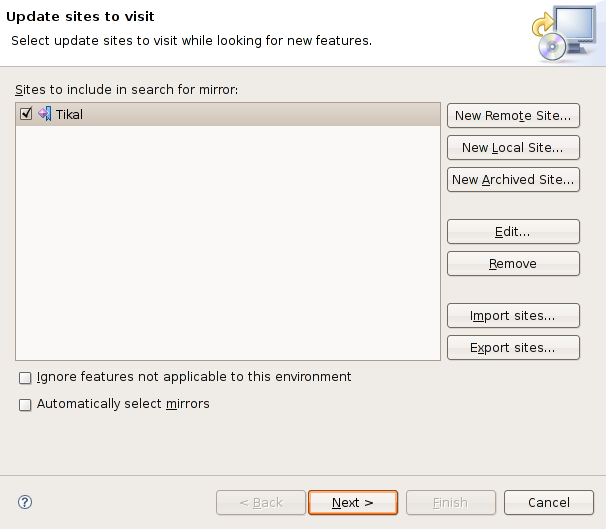
1. Create a bookmark for an update site where Eclipse features and plug-ins are published. In the sites to search list, select Add Update Site to add a remote site, or Add Local Site if the site is available on a local drive (including a CD), or Add Archived Site, when the site is available locally but is packaged as a jar or zip file.
2. In the add site dialog, give the site a name such as "CompanyA" and enter the URL such as "http://companyA.example.com/eclipseupdates".
3. After adding the site, expand it to the categories of feature versions available at that update site. This will contact the web site to discover what features are available.
4. Select the categories you want to search and click Next.
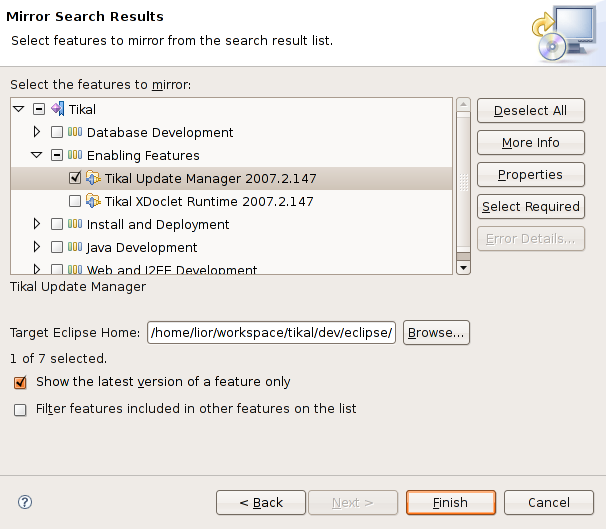
5. Wait for the search to finish and select the features to be mirrored. You can view the description or more detailed properties for any feature by selecting the feature and pressing the "Properties" button.
6. You can change the "Target Eclipse Home" by selecting the Browse....
For easier browsing of the site, it is recommended to create categories and organize the features under those categories. A category has a name and a translatable label for display. A feature may appear in >= 0 categories. Categorization enables Update Manager to present a hierarchical view of features.
"Copy original categories when adding features" check box, when checked is using the original features categories when adding them to the mirror site.
Features are mirrored recursively when you press Mirror. This means that the features and all the plug-ins and fragments they include will be mirrored in a single batch operation. The feature JARs will end up in the OR ends up features/ folder and the plug-in JARs are placed in the plugins/ folder of the mirror site project.
Feature Environments
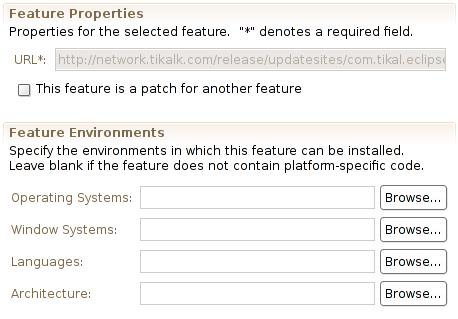
Features that do not carry such environment constraints are portable and can be installed on all platforms. If a feature has environment constraints that do not match the user's current platform, you can set Update Manager to filter it out.
For faster filtering, feature environments should be associated with a feature entry in the mirrorsite.xml.